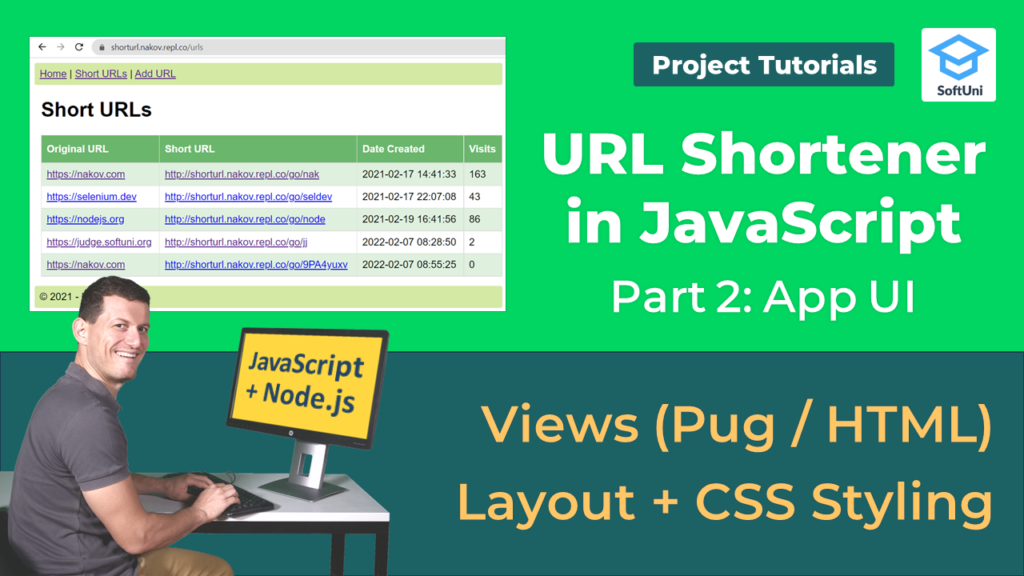
In the second part of the tutorial, we will create the user interface for our web application. This will include all the views, CSS, and the layout page. If you haven’t read our previous blog post, where we created our project, you can do it from here.
We start with building the layout page. It allows us to define a common site template that can be inherited in multiple views to provide a consistent look and feel in multiple pages of an application. The layout view eliminates duplicate coding and enhances development speed and easy maintenance.
- Inside the views folder, we create a layout.pug.
layout.pug
					<!DOCTYPE html>
html(lang='en')
  head
    block head
    link(rel='stylesheet', href='/styles.css')
    <meta name="viewport" content="width=device-width, initial-scale=1.0">
  body
    header
      a(href='/') Home
      span  |
      a(href='/urls') Short URLs
      span  |
      a(href='/add-url') Add URL

    main
      block content

    footer
      div © 2022 - URL Shortener
- In the head section, we import the .css file that will include our styling. We will create it later inside the public folder.
- For the body part, we have a header with the navigation of our application. Each anchor tag will lead us to another route.
- In the main block is the block content that every time will re-render differently depending on our route.
- We will create a styles.css in our public folder that we made in our previous part.
styles.css
					body {
  font-family: Arial, Helvetica, sans-serif;
}

header, footer {
  background:rgb(212, 233, 164);
  padding: 8px;
  border-radius: 3px;
}

footer {
  margin-top: 15px;
}

main {
  margin-left: 10px;
}


table {
  width: 100%;
  border-collapse: collapse;
  background-color: #f5fff5;
}

table th, table td {
  border: 1px solid #ddd;
}

table th {
  padding: 12px 8px;
  text-align: left;
  background-color: rgb(107, 182, 109);
  color: white;
}

table td {
  padding: 8px;
  overflow-wrap: anywhere;
}

table tr:nth-child(even) {
  background-color: #dff0de;
}

table tr:hover {
  background-color: rgb(198, 207, 180);
}


form table {
  width: 100%;
  max-width: 600px;
}

form table td:nth-child(1) {
  width: 10%;
  white-space: nowrap;
}

main form input {
  width: 100%;
  min-width: 100px;
  box-sizing: border-box;
}
- If we want to add more pages, we need to set up the routes in our controller. As we did in the previous part, we create different functions for each route. In the mvc-controller.js, we will expand the functionality with new functions.
mvc-controller.js
					function setup(app, data) {
  app.get('/', function(req, res) {
        //  Same as before
  });

  app.get('/urls', function(req, res) {
    let model = { urls: data.urls };
    res.render('urls', model);
  });

  app.get('/add-url', function(req, res) {
    let model = { url: "", code: "newCode" };
    res.render('add-url', model);
  });

  app.post('/add-url', function(req, res) {
    res.redirect('/urls');
  });

}

function date2text(inputDate) {
  let date = inputDate.toISOString().split('.')[0];
  date = date.replace('T', ' ');
  return date;
}

module.exports = { setup };
- With the first function, we will get the view with all the URLs. It will be the same as the home view functionality.
- The second function will load the view for the create page. We will access it with the “/add-url” route.
- The next third function will have the same route as the previous but with a different type of request. In the app.get(‘/add-url’, … ) we request the view, but with app.post(‘/add-url, …) we will send data to the server. They are on the same route, but we send different types of requests.
- We will add a helping function data2text() that will be outside of the setup() function. It will help us later.
- What we need to do next is to create .pug view. First, we will add the urls.pug inside our views folder. We add the following code inside it:
urls.pug
					extends layout.pug

block append head
  title='Short URLs'

block content
  h1 Short URLs
  table
    thead
      tr
        th Original URL
        th Short URL
        th Date Created
        th Visits
    tbody
      each url in urls
        tr
          td
            a(href=`${url.url}` target="_blank") #{url.url}
          td
            a(href=`${url.shortUrl}` target="_blank") #{url.shortUrl}
          td #{url.dateCreated}
          td #{url.visits}
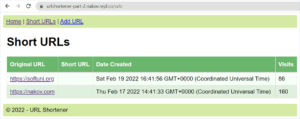
- In this view, we will have an HTML table featuring all the records that we request from the server. They are bound to the urls variable. To access each element separately we need to iterate over the collection with a for-each loop. Each row will be with data for a specific record, and every cell with a value for a specific property of the object.
If we start the project and go to the ‘/urls‘ route, this will visualize:
- In next part we will add the add-url.pug view. We add it inside the views folder.
add-url.pug
					extends layout.pug

block append head
  title='Add Short URL'

block content
  h1 Add Short URL
  form(method='POST' action='/add-url')
    table
      tr
        td
          label(for='url') URL:
        td
          input#url(type='text', name='url', value=`${url}`)
      tr
        td
          label(for='code') Short Code:
        td
          input#code(type='text', name='code', value=`${code}`)
      tr
        td(colspan="2")
          button(type='submit') Create
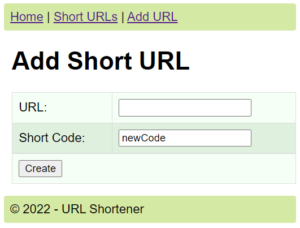
- In this view, we add a form that is with a POST method, and an action points to ‘/add-url‘. To explain what this does, after pressing the submit button, the server will request the app.post(‘/add-url’, …) function that we have typed inside our mvc-controller. In the next parts, we will add the functionality that saves the record inside the database.
- Inside the form, we have two input fields. Inside each field, the user will type the values for the URL he needs to create.
- In the end, it is important for the button to be of type submit. This will submit the form to the server.
If you have done everything correctly, going to the ‘/add-urls‘ route will display you this page:
After completing all the steps, your project will have a user interface that supports different types of screens. If we go to our two new routes ‘/urls‘, and ‘/add-urls‘ you will access the two new pages that we have added. On the ‘/add-urls‘ route, if you submit the form with the required data, you will send a POST request to the server. In the next parts, we will be able to save this information on the server and display it inside the ‘/urls‘ route.
Lesson Topics
- Building the Layout Template in Pug
- Adding CSS Styles
- Implementing the “View Short URLs Table”
- Styling the Table
- Implementing the “Add URL” Form
- CSS Styling for Small Screens